


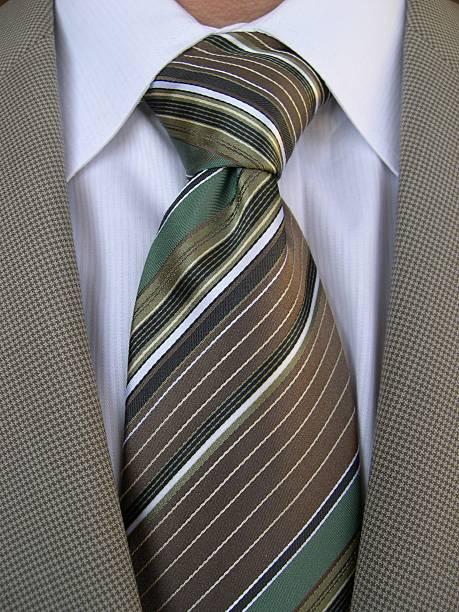
Going for a double knot is ideal if you want to enhance your look while remaining subtle, elegant, and classy. This knot, also known as the double Windsor knot, is the perfect fit for a classic dress shirt with widespread collars.
Since this knot is wider and thicker, you may need more length from the tie to create the perfect look. We recommend taller men to get an XL-sized tie to achieve a balanced look. Most people prefer the double Windsor knot because it pulls all formal appearances together.
Although fairly simple, it is common for people to go on a search for the best way of tying the perfect stopper knots. However, remember that despite its many names, the double knot is as simple as tying your shoelaces if you follow the right instructions.
How to Tie a Double Knot: 7 Easy Steps
All classy looks come from a fairly simple routine. Be it a white dress shirt for men or a chic white dress for women, it is established that simple is, in fact, classy. Now that we’re on the same page regarding fashion statements, we’ve come up with 7 helpful steps to get you the perfect double knot. Most of us as teens experienced our parents helping us with this for our winter formal, homecoming or prom.
Here’s how you can emerge as the star of a formal event with complete ease:
Step 1
Let’s picture you in front of a mirror with your classic, perfectly pressed dress shirt and neatly brushed hair. The only thing missing is a tie, which will make or break your look.
Well, don’t hesitate! Wrap those fingers around your collars and fold them up so that they’re upright. Then, undo your shirt’s top button and carefully place the untied tie around your neck, over your unfolded collar. You’ve already laid down the groundwork for magic by doing these two simple tasks.
An important element to ensure at this point would be to keep the wide part of the tie at least 6 to 7 inches beneath the narrow end. Finally, cross the wide end over the narrow end. So far, so good.
Step 2
Now that you’ve crossed the wide end of the tie over the narrow end, pass the tie upwards along the gap between the knot and your neck. Then, pull the tie across until it is set behind the narrow part of the tie.
Step 3
This simple step comprises repeating step 2 on the other side so you can get the perfect reef knot.
Step 4
Now that you have completed step 3, you will likely witness a fairly symmetrical knot near your neck. Now, you need to reach out to the wide end of the tie and wrap it so as you’re dragging it back over towards the front.

Step 5
This is where you have to cover the seemingly apparent knot by pulling the wide part of the tie loosely between the knot and your neck. This will create a loop, bringing you closer to your final look.
Step 6
Now that you have a newly created loop, slip the wide end of the tie through this for the perfect thick look.
Step 7
Voila! You’re pretty much done here. Adjust your tie and tighten it so there are no loose ends and it firmly grips around your collar. Gently fold your collars and take a minute to admire that wonderful reef knot!
If the instructions are still unclear, we recommend watching a video. Subscribe to one of those easy technique pages and get your hands on the easiest tying technique! Some tips would include:
- Keep it tight but not suffocating.
- Creating the knot requires accuracy, so focus on each step.
- Take note of any loose ends.
- Do not risk going for a messy look; ensure all steps are accurate.
- Disclaimer: the magic is in the details.
Origin of the Double Windsor Knot
We all know that a simple overhand knot looks classic on dress shirts, similar to a granny knot. However, it is fair to dig deep behind the origin. Interestingly, the double knot acquired the name of the Double Windsor Knot after the Duke of Windsor or, more specifically, King Edward VIII. He was known to prefer the firm double knot over the widely used four-in-hand knot.
The full Windsor knot is attractive due to its elegant appearance and is also widely comfortable because it puts a gap between the collar and the neck while keeping the tie firmly in place.
Interestingly, this knot is associated with immense prestige as it comes from the royal heritage of the English. Therefore, it is commonly referred to as a power knot in the business world.

Description of the Granny Knot-Look Alike: the Full Windsor Knot
The Full Windsor knot is one of the most iconic triangular-shaped and mainly symmetrical knots. Although this knot is self-releasing, there is no room for it to slip if it is tied accurately.
The loops behind the knot leave breathing room between the necktie and the collar line, making it comfortable to wear.

Advantages of a Double Knot
If you’ve tied the perfect double Windsor knot, here’s how you are likely to benefit from it:
It creates a steady knot with a symmetrical shape, giving it a neat look.
- Due to its thickness, it has a big triangle that perfectly complements a cutaway collar.
- This thick knot can pull the attention away from the wearer’s face. However, it looks best on round and square face shapes. Moreover, if you’ve got facial hair, it’s truly a cherry on top!

- Make sure you get the measurements right! Your tie for a thick double knot should be a minimum of 4 cm longer than the traditional tie.

Bottomline: Follow the Right Method for the Ultimate End Look
Following the right guidelines will ensure you get the perfect Windsor knot look. This bulky knot screams elegance like a flashing sign. Moreover, it promises to help you pull off the formal look exceptionally!
Find more information on necktie knots and ways of pulling them off at Flexsuits.


